Galaxy J3: Turn Wi-Fi On and Connect to a Wireless Network
Galaxy J3 - Turn Wi-Fi On and Connect to a Wireless Network
Use the Connections setting menu to enable your phone’s Wi-Fi feature and connect to an available Wi-Fi network.
Turn Wi-Fi On and Connect to a Wireless Network
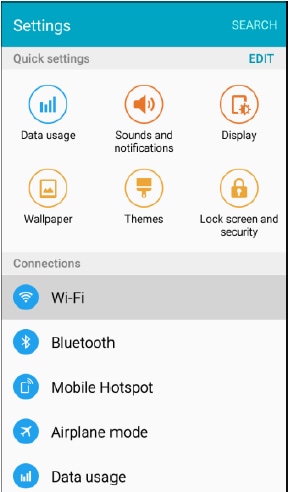
1. From home, tap Apps > Settings > Wi-Fi.

The Wi-Fi settings menu appears.
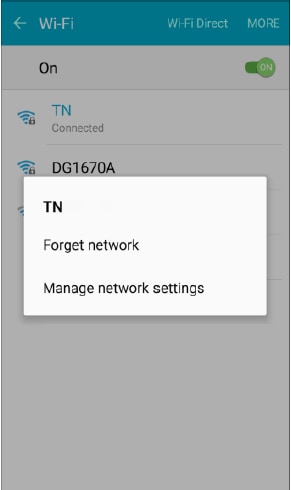
2. Tap ON/OFF to turn Wi-Fi on.

Wi-Fi is enabled. You will see the names and security settings of in-range Wi-Fi networks.
To disable Wi-Fi, tap ON/OFF again.
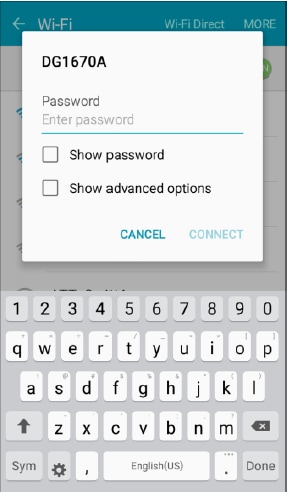
3. Tap a Wi-Fi network to connect, enter the password (if it is not an open network), and then tap Connect.

Your phone is connected to the Wi-Fi network. You will see in the status bar. The password, for a household wireless LAN router, is sometimes found on a sticker on the router (WEP, WPA, KEY, and more). Contact the router manufacturer for information. For password for a public wireless LAN, check with the user's service provider.
Entering a password is not required if an access point is not security protected.
Note: The next time your phone connects to a previously accessed secured wireless network, you will not be prompted to enter the password again, unless you reset your phone to its factory default settings or you instruct the phone to forget the network.
Thank you for your feedback!
Please answer all questions.